SvelteKitSite
The SvelteKitSite construct is a higher level CDK construct that makes it easy to create an SvelteKit app. It provides a simple way to build and deploy the app to AWS:
- The client assets are deployed to an S3 Bucket, and served out from a CloudFront CDN for fast content delivery.
- The app server is deployed to Lambda. You can deploy to Lambda@Edge instead if the
edgeflag is enabled. Read more about Single region vs Edge. - It enables you to configure custom domains for the website URL.
- It also enable you to automatically set the environment variables for your SvelteKit app directly from the outputs in your SST app.
- It provides a simple interface to grant permissions for your app to access AWS resources.
Quick Start
If you are creating a new SvelteKit app, run
create-sveltefrom the root of your SST app.npx create-svelte@latestAnd select
SvelteKit App Serveras the deployment target.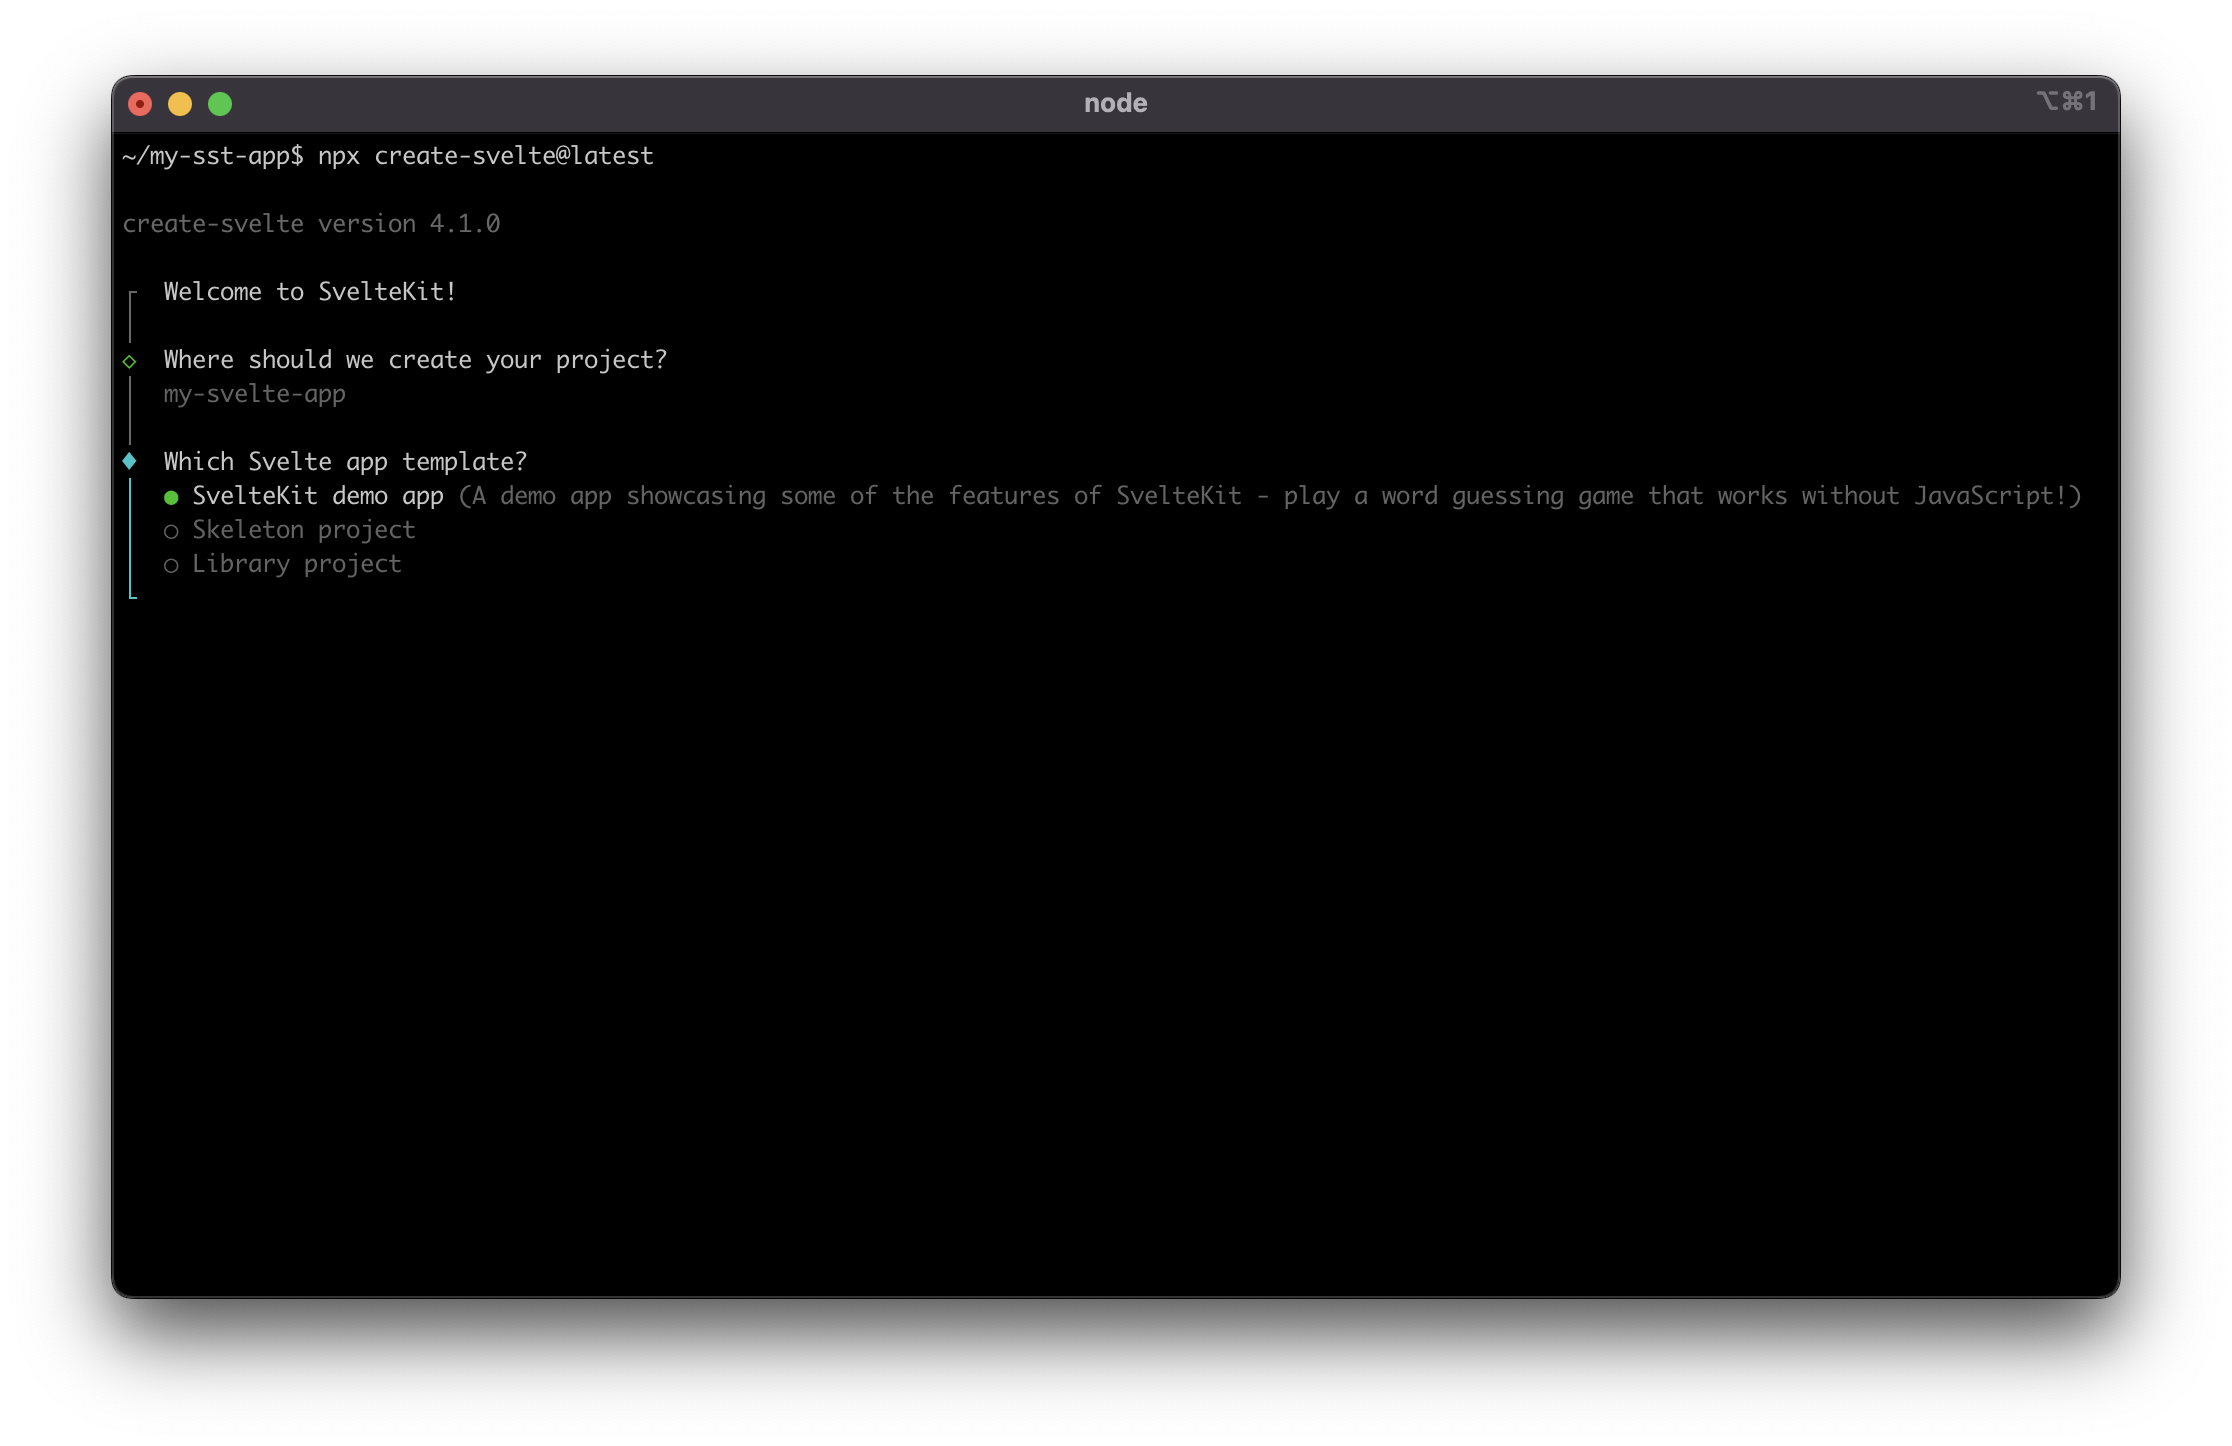
After the SvelteKit app is created, your SST app structure should look like:
my-sst-app
├─ sst.config.ts
├─ services
├─ stacks
└─ my-svelte-app     <-- new SvelteKit app
   ├─ src
   ├─ static
   └─ svelte.config.js
Continue to step 3.
Alternatively, if you have an existing SvelteKit app, move the app to the root of your SST app. Your SST app structure should look like:
my-sst-app
├─ sst.config.ts
├─ services
├─ stacks
└─ my-svelte-app     <-- your SvelteKit app
   ├─ src
   ├─ static
   └─ svelte.config.js
Let's set up the
svelte-kit-sstadapter for your SvelteKit app. The adapter will transform the SSR functions to a format that can be deployed to AWS. To do that, make sure yoursvelte.config.jslooks like the following.import adapter from "svelte-kit-sst";
import { vitePreprocess } from "@sveltejs/kit/vite";
const config = {
preprocess: vitePreprocess(),
kit: {
adapter: adapter()
}
};
export default config;And add the
svelte-kit-sstdependency to your SvelteKit app'spackage.json.npm install --save-dev svelte-kit-sstAlso add the
sst bindcommand to your SvelteKit app'spackage.json.sst bindenables you to automatically set the environment variables for your SvelteKit app directly from the outputs in your SST app."scripts": {
- "dev": "vite dev",
+ "dev": "sst bind vite dev",
"build": "vite build",
"preview": "vite preview"
},Add the
SvelteKitSiteconstruct to an existing stack in your SST app. You can also create a new stack for the app.import { SvelteKitSite, StackContext } from "sst/constructs";
export default function MyStack({ stack }: StackContext) {
// ... existing constructs
// Create the SvelteKit site
const site = new SvelteKitSite(stack, "Site", {
path: "my-svelte-app/",
});
// Add the site's URL to stack output
stack.addOutputs({
URL: site.url,
});
}When you are building your SST app,
SvelteKitSitewill invokenpm buildinside the SvelteKit app directory. Make surepathis pointing to the your SvelteKit app.We also added the site's URL to the stack output. After the deploy succeeds, the URL will be printed out in the terminal.
Working locally
To work on your SvelteKit site locally with SST:
Start SST in your project root.
npx sst devThen start your SvelteKit site. This should run
sst bind vite dev.npm run dev
note
When running sst dev, SST does not deploy your SvelteKit site. It's meant to be run locally.
Single region vs edge
There are two ways you can deploy the SvelteKit app to your AWS account.
By default, the SvelteKit app server is deployed to a single region defined in your sst.config.ts or passed in via the --region flag. Alternatively, you can choose to deploy to the edge. When deployed to the edge, loaders/actions are running on edge location that is physically closer to the end user. In this case, the app server is deployed to AWS Lambda@Edge.
You can enable edge like this:
const site = new SvelteKitSite(stack, "Site", {
  path: "my-svelte-app/",
  edge: true,
});
Note that, in the case you have a centralized database, Edge locations are often far away from your database. If you are quering your database in your loaders/actions, you might experience much longer latency when deployed to the edge.
info
We recommend you to deploy to a single region when unsure.
Custom domains
You can configure the website with a custom domain hosted either on Route 53 or externally.
const site = new SvelteKitSite(stack, "Site", {
  path: "my-svelte-app/",
  customDomain: "my-app.com",
});
Note that visitors to the http:// URL will be redirected to the https:// URL.
You can also configure an alias domain to point to the main domain. For example, to setup www.my-app.com redirecting to my-app.com:
const site = new SvelteKitSite(stack, "Site", {
  path: "my-svelte-app/",
  customDomain: {
    domainName: "my-app.com",
    domainAlias: "www.my-app.com",
  },
});
Environment variables
The SvelteKitSite construct allows you to set the environment variables in your SvelteKit app based on outputs from other constructs in your SST app. So you don't have to hard code the config from your backend. Let's look at how.
To expose environment variables to your SvelteKit application you should utilise the SvelteKitSite construct environment configuration property rather than an .env file within your SvelteKit application root.
Imagine you have an API created using the Api construct, and you want to fetch data from the API. You'd pass the API's endpoint to your SvelteKit app.
const api = new Api(stack, "Api", {
  // ...
});

new SvelteKitSite(stack, "Site", {
  path: "path/to/site",
  environment: {
    API_URL: api.url,
  },
});
Then you can access the API's URL in your server code:
import { env } from '$env/dynamic/private';

console.log(env.API_URL);
Note that, in SvelteKit, only environment variables prefixed with PUBLIC_ are available in your browser code. Read more about using environment variables.
For example, if you want to access the API's URL in your frontend js code, you'd name it PUBLIC_API_URL:
new SvelteKitSite(stack, "Site", {
  path: "path/to/site",
  environment: {
    PUBLIC_API_URL: api.url,
  },
});
And on the client side access it using.
import { env } from '$env/dynamic/public';

console.log(env.PUBLIC_API_URL);
Let's take look at what is happening behind the scene.
While deploying
On sst deploy, the SvelteKit app server is deployed to a Lambda function, and the SvelteKitSite's environment values are set as Lambda function environment variables. In this case, process.env.API_URL will be available at runtime.
If you enabled the edge option, the SvelteKit app server will instead get deployed to a Lambda@Edge function. We have an issue here, AWS Lambda@Edge does not support runtime environment variables. To get around this limitation, we insert a snippet to the top of your app server:
const environment = "{{ _SST_FUNCTION_ENVIRONMENT_ }}";
process.env = { ...process.env, ...environment };
And at deploy time, after the referenced resources have been created, the API in this case, a CloudFormation custom resource will update the app server's code and replace the placeholder {{ _SST_FUNCTION_ENVIRONMENT_ }} with the actual value:
const environment = {
  API_URL: "https://ioe7hbv67f.execute-api.us-east-1.amazonaws.com",
};
process.env = { ...process.env, ...environment };
This will make process.env.API_URL available at runtime.
While developing
To use these values while developing, run sst dev to start the Live Lambda Development environment.
npx sst dev
Then in your SvelteKit app to reference these variables, add the sst bind command.
"scripts": {
  "dev": "sst bind vite dev",
  "build": "vite build",
  "preview": "vite preview"
},
Now you can start your SvelteKit app as usual and it'll have the environment variables from your SST app.
npm run dev
There are a couple of things happening behind the scenes here:
- The
sst devcommand generates a file with the values specified by theSvelteKitSiteconstruct'senvironmentprop. - The
sst bindCLI will traverse up the directories to look for the root of your SST app. - It'll then find the file that's generated in step 1.
- It'll load these as environment variables before running the start command.
note
sst bind only works if the SvelteKit app is located inside the SST app or inside one of its subdirectories. For example:
/
  sst.config.ts
  my-svelte-app/
Using AWS services
Since the SvelteKitSite construct deploys your SvelteKit app to your AWS account, it's very convenient to access other resources in your AWS account. SvelteKitSite provides a simple way to grant permissions to access specific AWS resources.
Imagine you have a DynamoDB table created using the Table construct, and you want to fetch data from the Table.
const table = new Table(stack, "Table", {
  // ...
});

const site = new SvelteKitSite(stack, "Site", {
  path: "my-svelte-app/",
  environment: {
    TABLE_NAME: table.tableName,
  },
});

site.attachPermissions([table]);
Note that we are also passing the table name into the environment, so the SvelteKit server code can fetch the value process.env.TABLE_NAME when calling the DynamoDB API to query the table.
Architecture
The SvelteKit build output consists of three components:
- Client files — ie.
favicon.png - Server files — ie. Svelte server code
- Prerendered files — ie. prerendered pages and page data
Regional mode
In regional mode:
- Client files are uploaded to S3
- Server files are bundled and deployed to Lambda
- Prerendered files are copied into the server Lambda bundle
The CloudFront distribution is set up to route:
- Requests for static files to S3 (ie.
favicon.png) - Requests for immutable asset files to S3 (ie.
/_app/immutable/*) - Other requests to the Lambda function
- If the request is for a prerendered page, the function serves the prerendered files packaged in the function bundle.
- If the request is for a server-side rendered (SSR) page, the function runs the SvelteKit server to handle the request.
Edge mode
In edge mode:
- Client files are uploaded to S3
- Server files are bundled and deployed to Lambda@Edge
- Prerendered files are uploaded to S3
The CloudFront distribution is set up to route:
- Requests for static files to S3 (ie.
/favicon.png) - Requests for immutable asset files to S3 (ie.
/_app/immutable/*) - Other requests to the Lambda@Edge function
- If the request is for a prerendered page, the edge function forwards the request to S3.
- If the request is for a server-side rendered (SSR) page, the edge function run the SvelteKit server to handle the request.
Summary
| Example | Regional Mode | Edge Mode | |
|---|---|---|---|
| At deploy time | |||
| Client files | favicon.png | Uploaded to S3 | Uploaded to S3 |
| Server files | SvelteKit server code | Deployed to Lambda | Deployed to Lambda@Edge |
| Prerendered files | about.html | Copied into the server Lambda bundle | Uploaded to S3 |
| At run time | |||
| Requests for static files | /favicon.png | Routed to S3 | Routed to S3 |
| Requests for immutable assets | /_app/immutable/assets/_page.9d501049.css | Routed to S3 | Routed to S3 |
| Requests for prerendered pages | /about | Routed to Lambda and served from function bundle | Routed to Lambda and forwarded to S3 |
| Requests for SSR pages | /my-home-feed | Routed to Lambda and handled by SvelteKit server | Routed to Lambda and handled by SvelteKit server |
Warming
Server functions may experience performance issues due to Lambda cold starts. SST helps mitigate this by creating an EventBridge scheduled rule to periodically invoke the server function.
new SvelteKitSite(stack, "Site", {
  path: "my-svelte-app/",
  warm: 20,
});
Setting warm to 20 keeps 20 server function instances active, invoking them every 5 minutes.
Note that warming is currently supported only in regional mode.
Cost
There are three components to the cost:
EventBridge scheduler: $0.00864
Requests cost — 8,640 invocations per month x $1/million = $0.00864Warmer function: $0.145728288
Requests cost — 8,640 invocations per month x $0.2/million = $0.001728
Duration cost — 8,640 invocations per month x 1GB memory x 1s duration x $0.0000166667/GB-second = $0.144000288
Server function: $0.0161280288 per warmed instance
Requests cost — 8,640 invocations per month x $0.2/million = $0.001728
Duration cost — 8,640 invocations per month x 1GB memory x 100ms duration x $0.0000166667/GB-second = $0.0144000288
For example, keeping 50 instances of the server function warm will cost approximately $0.96 per month
$0.00864 + $0.145728288 + $0.0161280288 x 50 = $0.960769728
This cost estimate is based on the us-east-1 region pricing and does not consider any free tier benefits.
Examples
Configuring custom domains
You can configure the website with a custom domain hosted either on Route 53 or externally.
Using the basic config (Route 53 domains)
new SvelteKitSite(stack, "Site", {
  path: "my-svelte-app/",
  customDomain: "my-app.com",
});
Redirect www to non-www (Route 53 domains)
new SvelteKitSite(stack, "Site", {
  path: "my-svelte-app/",
  customDomain: {
    domainName: "my-app.com",
    domainAlias: "www.my-app.com",
  },
});
Configuring domains across stages (Route 53 domains)
new SvelteKitSite(stack, "Site", {
  path: "my-svelte-app/",
  customDomain: {
    domainName:
      scope.stage === "prod" ? "my-app.com" : `${scope.stage}.my-app.com`,
    domainAlias: scope.stage === "prod" ? "www.my-app.com" : undefined,
  },
});
Configuring alternate domain names (Route 53 domains)
You can specify additional domain names for the site url. Note that the certificate for these names will not be automatically generated, so the certificate option must be specified. Also note that you need to manually create the Route 53 records for the alternate domain names.
import * as acm from "aws-cdk-lib/aws-certificatemanager";
import * as route53 from "aws-cdk-lib/aws-route53";
import * as route53Targets from "aws-cdk-lib/aws-route53-targets";

// Look up hosted zone
const hostedZone = route53.HostedZone.fromLookup(stack, "HostedZone", {
  domainName: "domain.com",
});

// Create a certificate with alternate domain names
const certificate = new acm.DnsValidatedCertificate(stack, "Certificate", {
  domainName: "foo.domain.com",
  hostedZone,
  region: "us-east-1",
  subjectAlternativeNames: ["bar.domain.com"],
});

// Create site
const site = new SvelteKitSite(stack, "Site", {
  path: "my-svelte-app/",
  customDomain: {
    domainName: "foo.domain.com",
    alternateNames: ["bar.domain.com"],
    cdk: {
      hostedZone,
      certificate,
    },
  },
});

// Create A and AAAA records for the alternate domain names
const recordProps = {
  recordName: "bar.domain.com",
  zone: hostedZone,
  target: route53.RecordTarget.fromAlias(
    new route53Targets.CloudFrontTarget(site.cdk.distribution)
  ),
};
new route53.ARecord(stack, "AlternateARecord", recordProps);
new route53.AaaaRecord(stack, "AlternateAAAARecord", recordProps);
Importing an existing certificate (Route 53 domains)
import { Certificate } from "aws-cdk-lib/aws-certificatemanager";

new SvelteKitSite(stack, "Site", {
  path: "my-svelte-app/",
  customDomain: {
    domainName: "my-app.com",
    cdk: {
      certificate: Certificate.fromCertificateArn(stack, "MyCert", certArn),
    },
  },
});
Note that, the certificate needs be created in the us-east-1(N. Virginia) region as required by AWS CloudFront.
Specifying a hosted zone (Route 53 domains)
If you have multiple hosted zones for a given domain, you can choose the one you want to use to configure the domain.
import { HostedZone } from "aws-cdk-lib/aws-route53";

new SvelteKitSite(stack, "Site", {
  path: "my-svelte-app/",
  customDomain: {
    domainName: "my-app.com",
    cdk: {
      hostedZone: HostedZone.fromHostedZoneAttributes(stack, "MyZone", {
        hostedZoneId,
        zoneName,
      }),
    },
  },
});
Configuring externally hosted domain
import { Certificate } from "aws-cdk-lib/aws-certificatemanager";

new SvelteKitSite(stack, "Site", {
  path: "my-svelte-app/",
  customDomain: {
    isExternalDomain: true,
    domainName: "my-app.com",
    cdk: {
      certificate: Certificate.fromCertificateArn(stack, "MyCert", certArn),
    },
  },
});
Note that the certificate needs be created in the us-east-1(N. Virginia) region as required by AWS CloudFront, and validated. After the Distribution has been created, create a CNAME DNS record for your domain name with the Distribution's URL as the value. Here are more details on configuring SSL Certificate on externally hosted domains.
Also note that you can also migrate externally hosted domains to Route 53 by following this guide.
Configuring server function
new SvelteKitSite(stack, "Site", {
  path: "my-svelte-app/",
  timeout: "5 seconds",
  memorySize: "2048 MB",
});
Advanced examples
Configuring VPC
Note that VPC is only supported when deploying to a single region.
import { Vpc, SubnetType } as ec2 from "aws-cdk-lib/aws-ec2";

// Create a VPC
const vpc = new Vpc(stack, "myVPC");

// Alternatively use an existing VPC
const vpc = Vpc.fromLookup(stack, "myVPC", { ... });

new SvelteKitSite(stack, "Site", {
  path: "my-svelte-app/",
  cdk: {
    server: {
      vpc,
      vpcSubnets: {
        subnetType: SubnetType.PRIVATE_WITH_NAT,
      }
    }
  }
});
Using an existing S3 Bucket
import { Bucket } from "aws-cdk-lib/aws-s3";
import { OriginAccessIdentity } from "aws-cdk-lib/aws-cloudfront";

new SvelteKitSite(stack, "Site", {
  path: "my-svelte-app/",
  cdk: {
    bucket: Bucket.fromBucketName(stack, "Bucket", "my-bucket"),
    // Required for non-public buckets
    s3Origin: {
      originAccessIdentity: OriginAccessIdentity.fromOriginAccessIdentityId(
        stack,
        "OriginAccessIdentity",
        "XXXXXXXX"
      ),
    },
  },
});
Setting the originAccessIdentity prop enables an imported bucket to be properly secured with a bucket policy without giving public access to the bucket.
Reusing CloudFront cache policies
CloudFront has a limit of 20 cache policies per AWS account. This is a hard limit, and cannot be increased. If you plan to deploy multiple SvelteKit sites, you can have the constructs share the same cache policies by reusing them across sites.
import * as cdk from "aws-cdk-lib";
import * as cf from "aws-cdk-lib/aws-cloudfront";

const serverCachePolicy = new cf.CachePolicy(stack, "ServerCache", {
  queryStringBehavior: cf.CacheQueryStringBehavior.all(),
  headerBehavior: cf.CacheHeaderBehavior.none(),
  cookieBehavior: cf.CacheCookieBehavior.all(),
  defaultTtl: cdk.Duration.days(0),
  maxTtl: cdk.Duration.days(365),
  minTtl: cdk.Duration.days(0),
  enableAcceptEncodingBrotli: true,
  enableAcceptEncodingGzip: true,
});

new SvelteKitSite(stack, "Site1", {
  path: "my-svelte-app/",
  cdk: {
    serverCachePolicy,
  },
});

new SvelteKitSite(stack, "Site2", {
  path: "another-svelte-app/",
  cdk: {
    serverCachePolicy,
  },
});
Protecting server function behind API Gateway
When deployed to a single region, instead of sending the request to the server function directly, you can send the request to API Gateway and have API Gateway proxy the request to the server function. With this setup, you can use features like authorizers to protect the server function.
import { Fn } from "aws-cdk-lib";
import * as origins from "aws-cdk-lib/aws-cloudfront-origins";

// Create an API Gateway API
const api = new Api(stack, "Api");

// Configure the CloudFront distribution to route requests to the API endpoint
const site = new SvelteKitSite(stack, "Site", {
  path: "my-svelte-app/",
  cdk: {
    distribution: {
      defaultBehavior: {
        origin: new origins.HttpOrigin(Fn.parseDomainName(api.url)),
      },
    },
  },
});

// Configure the API Gateway to route all incoming requests to the site's SSR function
// Note: The site is not deployed when using the `sst dev` command
if (!app.local) {
  api.addRoutes(stack, {
    "ANY /{proxy+}": {
      type: "function",
      cdk: {
        function: site.cdk.function,
      },
    },
  });
}
Constructor
new SvelteKitSite(scope, id, props)
Parameters
- scope Construct
- id string
- props SvelteKitSiteProps
SvelteKitSiteProps
assets?
Type :
assets.fileOptions?
Type : Array<SsrSiteFileOptions>
List of file options to specify cache control and content type for cached files. These file options are appended to the default file options so it's possible to override the default file options by specifying an overlapping file pattern.
assets: {
  fileOptions: [
    {
      files: "**/*.zip",
      cacheControl: "private,no-cache,no-store,must-revalidate",
      contentType: "application/zip",
    },
  ],
}
assets.nonVersionedFilesCacheHeader?
Type : string
Default : public,max-age=0,s-maxage=86400,stale-while-revalidate=8640
The header to use for non-versioned files (ex:
index.html
) in the CDN cache. When specified, the
nonVersionedFilesTTL
option is ignored.
assets: {
  nonVersionedFilesCacheHeader: "public,max-age=0,no-cache"
}
assets.nonVersionedFilesTTL?
Type : number | ${number} second | ${number} seconds | ${number} minute | ${number} minutes | ${number} hour | ${number} hours | ${number} day | ${number} days
Default : 1 day
The TTL for non-versioned files (ex:
index.html
) in the CDN cache. Ignored when
nonVersionedFilesCacheHeader
is specified.
assets: {
  nonVersionedFilesTTL: "4 hours"
}
assets.textEncoding?
Type : "ascii" | "utf-8" | "none" | "iso-8859-1" | "windows-1252"
Default : utf-8
Character encoding for text based assets uploaded to S3 (ex: html, css, js, etc.). If "none" is specified, no charset will be returned in header.
assets: {
  textEncoding: "iso-8859-1"
}
assets.versionedFilesCacheHeader?
Type : string
Default : public,max-age=31536000,immutable
The header to use for versioned files (ex:
main-1234.css
) in the CDN cache. When specified, the
versionedFilesTTL
option is ignored.
assets: {
  versionedFilesCacheHeader: "public,max-age=31536000,immutable"
}
assets.versionedFilesTTL?
Type : number | ${number} second | ${number} seconds | ${number} minute | ${number} minutes | ${number} hour | ${number} hours | ${number} day | ${number} days
Default : 1 year
The TTL for versioned files (ex:
main-1234.css
) in the CDN and browser cache. Ignored when
versionedFilesCacheHeader
is specified.
assets: {
  versionedFilesTTL: "30 days"
}
bind?
Type : Array<BindingResource>
Bind resources for the function
new Function(stack, "Function", {
  handler: "src/function.handler",
  bind: [STRIPE_KEY, bucket],
})
buildCommand?
Type : string
Default : npm run build
The command for building the website
buildCommand: "yarn build",
customDomain?
Type : string | SsrDomainProps
The customDomain for this website. SST supports domains that are hosted either on Route 53 or externally.
Note that you can also migrate externally hosted domains to Route 53 by following this guide.
customDomain: "domain.com",
customDomain: {
  domainName: "domain.com",
  domainAlias: "www.domain.com",
  hostedZone: "domain.com"
},
dev?
Type :
dev.deploy?
Type : boolean
Default : false
When running
sst dev
, site is not deployed. This is to ensure
sst dev
can start up quickly.
dev: {
  deploy: true
}
dev.url?
Type : string
The local site URL when running
sst dev
.
dev: {
  url: "http://localhost:3000"
}
edge?
Type : boolean
Default : false
The server function is deployed to Lambda in a single region. Alternatively, you can enable this option to deploy to Lambda@Edge.
environment?
Type : Record<string, string>
An object with the key being the environment variable name.
environment: {
  API_URL: api.url,
  USER_POOL_CLIENT: auth.cognitoUserPoolClient.userPoolClientId,
},
invalidation?
Type :
invalidation.paths?
Type : Array<string> | "none" | "all" | "versioned"
Default : "all"
The paths to invalidate. There are three built-in options:
- "none" - No invalidation will be performed.
- "all" - All files will be invalidated when any file changes.
- "versioned" - Only versioned files will be invalidated when versioned files change. Alternatively you can pass in an array of paths to invalidate. Disable invalidation:
invalidation: {
  paths: "none",
}
Invalidate "index.html" and all files under the "products" route:
invalidation: {
  paths: ["/index.html", "/products/*"],
}
invalidation.wait?
Type : boolean
Default : false
While deploying, SST waits for the CloudFront cache invalidation process to finish. This ensures that the new content will be served once the deploy command finishes. However, this process can sometimes take more than 5 mins. For non-prod environments it might make sense to pass in
false
. That'll skip waiting for the cache to invalidate and speed up the deploy process.
invalidation: {
  wait: true,
}
memorySize?
Type : number | ${number} MB | ${number} GB
Default : 1024 MB
The amount of memory in MB allocated for SSR function.
memorySize: "512 MB",
nodejs?
Type : SsrSiteNodeJSProps
Used to configure nodejs function properties
path?
Type : string
Default : "."
Path to the directory where the app is located.
permissions?
Type : Permissions
Attaches the given list of permissions to the SSR function. Configuring this property is equivalent to calling
attachPermissions()
after the site is created.
permissions: ["ses"]
regional?
Type :
regional.enableServerUrlIamAuth?
Type : boolean
Default : false
Secure the server function URL using AWS IAM authentication. By default, the server function URL is publicly accessible. When this flag is enabled, the server function URL will require IAM authorization, and a Lambda@Edge function will sign the requests. Be aware that this introduces added latency to the requests.
regional.prefetchSecrets?
Type : boolean
Default : false
Prefetches bound secret values and injects them into the function's environment variables.
runtime?
Type : "nodejs16.x" | "nodejs18.x" | "nodejs20.x"
Default : nodejs18.x
The runtime environment for the SSR function.
runtime: "nodejs20.x",
timeout?
Type : number | ${number} second | ${number} seconds | ${number} minute | ${number} minutes | ${number} hour | ${number} hours | ${number} day | ${number} days
Default : 10 seconds
The execution timeout in seconds for SSR function.
timeout: "5 seconds",
typesPath?
Type : string
Default : "."
Path relative to the app location where the type definitions are located.
waitForInvalidation?
Type : boolean
Default : false
While deploying, SST waits for the CloudFront cache invalidation process to finish. This ensures that the new content will be served once the deploy command finishes. However, this process can sometimes take more than 5 mins. For non-prod environments it might make sense to pass in
false
. That'll skip waiting for the cache to invalidate and speed up the deploy process.
Use
invalidation.wait
instead.
warm?
Type : number
Default : Server function is not kept warm
The number of server functions to keep warm. This option is only supported for the regional mode.
cdk?
Type :
cdk.bucket?
Type : IBucket | BucketProps
Allows you to override default settings this construct uses internally to create the bucket
cdk.distribution?
Type : SsrCdkDistributionProps
Pass in a value to override the default settings this construct uses to
create the CDK
Distribution
internally.
cdk.id?
Type : string
Allows you to override default id for this construct.
cdk.responseHeadersPolicy?
Type : IResponseHeadersPolicy
Override the CloudFront response headers policy properties for responses from the server rendering Lambda.
cdk.s3Origin?
Type : S3OriginProps
Override the CloudFront S3 origin properties.
import { OriginAccessIdenty } from "aws-cdk-lib/aws-cloudfront";

cdk: {
  s3Origin: {
    originAccessIdentity: OriginAccessIdentity.fromOriginAccessIdentityId(stack, "OriginAccessIdentity", "XXXXXXXX" ),
  },
}
cdk.server?
Type :
cdk.serverCachePolicy?
Type : ICachePolicy
Default : By default, the cache policy is configured to cache all responses from the server rendering Lambda based on the query-key only. If you're using cookie or header based authentication, you'll need to override the cache policy to cache based on those values as well.
Override the CloudFront cache policy properties for responses from the server rendering Lambda.
cdk.viewerProtocolPolicy?
Type : ViewerProtocolPolicy
Default : ViewerProtocolPolicy.REDIRECT_TO_HTTPS
Override the CloudFront viewer protocol policy properties.
import { ViewerProtocolPolicy } from "aws-cdk-lib/aws-cloudfront";

cdk: {
  viewerProtocolPolicy: ViewerProtocolPolicy.REDIRECT_TO_HTTPS,
}
Properties
An instance of SvelteKitSite has the following properties.
customDomainUrl
Type : undefined | string
If the custom domain is enabled, this is the URL of the website with the custom domain.
id
Type : string
url
Type : undefined | string
The CloudFront URL of the website.
cdk
Type : undefined |
cdk.bucket
Type : Bucket
cdk.certificate
Type : undefined | ICertificate
cdk.distribution
Type : IDistribution
cdk.function
Type : undefined | IFunction | Function
cdk.hostedZone
Type : undefined | IHostedZone
The internally created CDK resources.
Methods
An instance of SvelteKitSite has the following methods.
attachPermissions
attachPermissions(permissions)
Parameters
- permissions Permissions
Attaches the given list of permissions to allow the server side rendering framework to access other AWS resources.
site.attachPermissions(["sns"]);
getConstructMetadata
getConstructMetadata()